come back often

Have you checked out all my blogs?


Dollhouse Minis: http://joannes18dolls.blogspot.com/


18” Dolls: http://joannes18dolls.blogspot.com/


General Crafts: http://joannes-place.blogspot.com/


Cooking: https://joanne-kitchen.blogspot.com/


Saturday, September 12, 2015

Sticker & Washi Haul


So one day this week I decided it was time to play hooky from making videos and writing blog posts and take a day just for me. So I spent an entire day out of the house shopping. I came back ready to tackle all the projects on my to-do list and I have some fun new stickers and rolls of washi tape to play with. I got a bunch of other less fun stuff but I won't bore you with that.


My first stop was Walmart so I could get some household shopping out of the way first. Of course I made sure to check out every aisle that had any kind of craft supply on it and I paid extra attention in the office supply/ back to school areas for planner supplies.

I didn't find much but I did manage to find a couple of packages of stickers. One has some leaves since I have a fall leaf spread planned for a couple of weeks from now (September 21st to the 27th) and also a package with some nice fir trees for something I am hoping to do in December. The biggest score at Walmart was in the washi tape department. I have some washi tape already but I am always looking for more, especially in colors I think will go in my planner in the near future. I was able to find 4 rolls of Studio G tape that I think will go well. And then I needed to pick up some Duct tape for another project and noticed that there was washi tape on that display too so I picked up one of those too.


Later in the day I stopped at Michaels and found they were having a “buy 1 get 1 at 50% off” sale so I picked out 4 more sheets of stickers there. One sheet was some fall leaves and then the other 3 I am hoping to use for the October and November monthly spreads. Most of the stickers on these three pages are 3-D and I will probably have to work with them to make them thinner but for the most part I think they will work out well.


I also decided to stop at the “teacher store” Learning Palace to look for stickers. I love the fact that the stickers here are cheaper and you get tons of them. Granted they are repetitive but I can either save some to use next year, trade some, and/or use some for card making and art journaling.


After I got done filming the video I was going through my bags I brought home putting a few things away and I cam across this package of Cowboy themed stickers I picked up at the Dollar Tree. I am going it be saving this one for next summer to use on the July monthly spread since around here July is rodeo month. I think that will be a really fund spread.

Tuesday, September 8, 2015

Plan With Me- Purple Theme


Thank you for checking out my PWM, I hope this week's video is a bit better than last week. I am trying to do my best to bring you a good PWM video and I thank you for your patience as I learn.


This week I really wanted to make some full box background stickers that found on the Etsy shop Hannah 4 Stickers (link to shop below) the center of attention. Since these are so pretty I printed them out on semi gloss photo paper and then ran them through my Create a Sticker by XYRON using the re-positionable adhesive.

For the majority of the functional stickers I stuck with an all in one kit from J W Plans also on Etsy (the link to this shop is also below).

I am really happy with how the spread turned out. It is pretty simple but still very pretty. I have plenty of room to write as the week goes on.

I had intended to use some washi tape on the side and bottom areas of the pages but I just didn't have any that I felt would work with what I had in mind so I once again used scrap book paper. This time I had a sheet of a blue and purple background design and I love how it looks. Since I have my new Create a Sticker now and it is so easy to use I simply ran some strips of the cardstock through it to add an adhesive backing. This was soooo much easier than the way I have done this in the past.


Here are the links to all the stickers I used in the spread this week.

September Kit from JW Plans
Full box backgrounds from Hannah4Stickers
Watering cans from Hannah4Stickers
Bath tub and nail polish from Little Blue Garden 
Weather Dots from Stamped by My Heart

Drink It from Silver Shed Crafts

Friday, September 4, 2015

XYRON Create a Sticker


Last week when I was getting ready to fill out my day planner for the week I decided that some of the designs I wanted for stickers would just look so much better if they were printed on photo paper. I figured no problem since I have one of those little Xyron machines that you pull the paper through and it makes whatever you pull through into a sticker. Well, I had 2 problems with that plan. For one the little squares of photo paper were cut just a tiny bit too big to go through the small machine. They went through but just barely and some of them got kind of banged up on the corners. The other problem was that although it is not too big of a deal to do one thing in that machine doing several is a pain in the you know what. It was hard to get them lined up so they would even go through and then some got caught in the middle and it was almost more hassle than it was worth.

Since I had a couple of things I wanted to look at Joann Fabric this week I took a stroll down the aisle where they have the various Xyron machines. I was wanted to see just how much it would cost to up one step in these machines and what that would give me over the one I already have. Well, the price wasn't too horrid to go up to the one that has 2 ½” opening and it has a handle so no more trying to reach into the stupid thing to retrieve the end of the sticker sheet.

All these machines seem to come with permanent adhesive in them but you can purchase re-positional adhesive. Since I had run into a few problems with the stickers I had made for my planner being really hard to get lined up since they stuck down immediately I sprung for a roll of the re-positional stuff too.

When I got home I was excited to open the box and get to work making some stickers but I did decide to sit down and read the directions before I did anything. The Create a Sticker is really easy to use and the instructions are very short.

I did have a bit of an issue getting the top open the first time to change the adhesive but after the first time I opened it it works fine now. The adhesive cartridge basically just slides into place and is really easy to change out.

I do like that you can see at a glance which cartridge is installed. I was concerned about how I would know but the label is right there where you slide in the item you want to back with the sticky stuff.

Once you insert your item into the mouth of the Create a Sticker all you need to do is turn the handle in a clock wise direction and it does the rest.

In addition to how easy it is to use another thing I like about this Sticker maker is that the clear cover sheet for the sticker tape is wound onto a spot in the adhesive cartridge. With the little purple version I had before it comes out with the rest of the sticker tape and I was always getting it stuck somewhere I didn't want it.

I have to say I am really happy with my purchase and I have a feeling it is going to get a lot of use in my craft room.


Wednesday, September 2, 2015

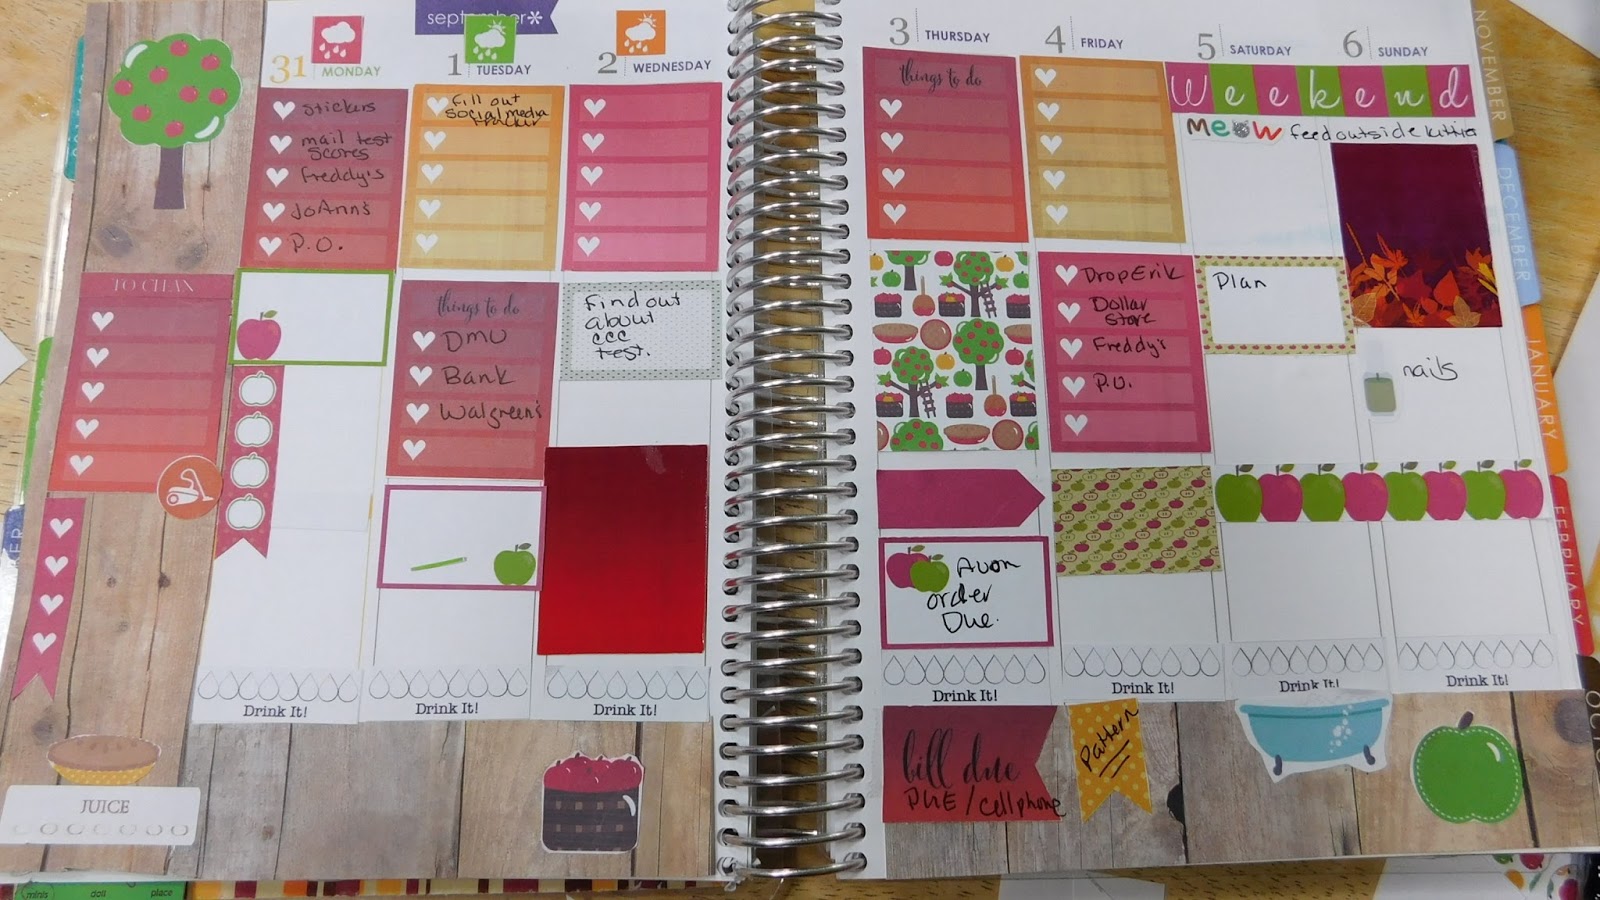
Plan With Me- Apple Theme


This week I decided to film my very first plan with me video. I know these will be easier as I practice so please hang in there with me and be patient.


This week as on all the other weeks I have planned so far in my Erin Condren planner I am using printable stickers that I purchased on Etsy. I will have the list of the stickers I used along with links to the shops I purchased them from.

I haven't broken down and ordered regular planner stickers yet because I tend to plan my themes at the last minute and then I need the stickers now. I don't want to wait for the stickers to be printed by someone else and then mailed to me. I guess I am just not patient enough for that yet. Maybe after I have been at this a while I will be able to wait for them. In the meantime I am going to continue with the printable ones.

I have been just using the Avery brand label paper that I picked up at Office Max so far. I am hoping to find some better paper online in the next couple of weeks.

I think I also see one of those electronic cutting machines in my future too. I have been wanting one of those for a couple of years now and I am thinking I might just go ahead and get one soon.

Okay, enough of this let's get onto the planning this week.

I have to admit that the first time I saw the Bohemian Autumn sticker set on Etsy I fell in love. I kept looking at it, I kept going back to that page every time I looked at the stickers. Up until this week I have stuck completely to the color theme that is already in the planner and this one while it coordinated it didn't really match. I went back and forth about whether I wanted to use it or not. Then I just went for it and purchased it.

I decided that even though it was absolutely beautiful I still wanted a theme to bring everything together. After a bit of thought and more looking at the beautiful choices of sets I decided on Apples for my main theme. I love how the three sets I choose to use compliment each other. And I have a bunch of stickers left over to use another time.

In the past I have only used the sticker/label paper to print my stickers on. Since I wanted to take advantage of the beautiful full boxes on the one page I had purchased I decided to print that page on a soft gloss photo paper. I think they turned out stunning! I then ran those pieces through my little purple Xyron sticker machine. I did run into a problem in that the little machine was just a tiny bit too narrow for the size of the boxes. I was happy enough with the process though that I actually purchased a larger sticker machine since I then.

I was smart enough to cut out all my stickers off camera I just need to come up with a better way of organizing them for next time. I think I have an idea and when I finally get it figured out I will show my method in a video.

To begin my planning this week I covered the side bar of the first page and the bottoms of both pages in the spread with some wood grain design scrapbook paper. I like to use this method sometimes instead of the normal washi tape especially since I don't always have tape that goes with my spread. I will show how I do that next time I use the paper but this time I ran into issues with my paper.

When I plan I usually use the top boxes of the Monday- Friday part for my blog and YouTube activities. This week I added full check boxes everyday for that part. I did mess up my filling out on the Monday box but I went back and fixed it after I finished editing the video.

The rest of each day I usually use for everything else that needs to be done. Since I normally plan on Saturday for the coming week I like to leave myself plenty of room to fill out stuff that needs to be done as the week progresses. At the bottom of each day is a hydrate sticker, I tried a larger one for all week on the sidebar a couple of times but I do better with one on each day. I tend to forget about the one on the sidebar later in the week. I like to put any bills that have to be paid at the bottom of the page. That way they stand out more and are less apt to be missed.

On the sidebar I like to have a list of major cleaning jobs I want to get done during the week. I don't worry too much if some of them end up getting pushed to a future week.

I usually add another checklist of some kind to the sidebar and some weeks I use it and some weeks it stays empty. It is there if I need it.

The only other sticker that I put on the side bar is a juice sticker that I made to help me track/remember to drink a glass of juice everyday.

The rest of the sidebar gives me room to decorate a bit with any larger stickers I might want to use and to group some of the smaller ones too. These also carry across the bottom area most weeks.

Some weeks if I have extra decorative stickers I a keep adding them as the week progresses if I have the space after days are over.

At the top of each day I like to put a weather sticker to denote the day's weather. Since our weather tends to be a bit fickle I only put on the first 3 days when I plan and then I add the last 4 days sometime on Wednesday. I also add the temperatures each day since those can change quickly around here. For me I am adding the weather information to look back at not to prepare for so this system works for me.


Now as for the stickers I used this week here are the names of the pages and the shops they came from. Be sure to click on the highlighted name of the shop if you want to check out what they have.

Bohemian Autumn from Ashley Lynn Impression
Apple Picking from Ink Obsessions Designs
Apple Set from Lemon Wishes
Weather Stickers from All About the House
Drink It from Silver Shed Crafts 

Spa Day (bath tub and nail polish bottle) from Little Blue Garden

Saturday, August 29, 2015

Planner Un-boxing and Walk Through


I think before we get to the planner and what comes with it I want to tell you a bit about why I decided to buy it.

Way back last December I had decided that I wanted to figure out some kind of planner to help me keep track of stuff. I am trying to keep up with multiple blogs, YouTube channels, Facebook, home-school my son, email from friends around the world and the rest that life throws my way. On top of all that I really want to get my Etsy shop back up and actually have it make some income. So as you can guess I have a lot to keep track of.

Back in December I started looking at planners in the stores but I didn't find what I thought I wanted. Most of the ones I found really didn't have the flexibility that I was looking for. Also frankly most of them were just plane boring.

Since finding one ready-made didn't seem to be something I was going to be able to do I of course decided to make my own. In many ways this was a good thing because I was able to really discover what I wanted (and just as importantly what I didn't want) in a planner.

Since January I have printed out several different types/styles of planners. Some of these I found as free printables online and some I designed myself on my computer. One big advantage of doing it yourself is you can work with one month at a time and change it before you print off next month. None of them were what I was looking for.

Fast forward to this summer. Oregon is experiencing a record breaking hot summer. Since summers are normally not all that bad here we don't have AC. It has been miserable and many days I have just not felt like doing much. What I have been doing is spending a lot of time watching YouTube videos. I started out watching some crafting videos and then when I ran out of those I started watching a bunch of beauty/makeup videos. For some reason those are the channels that have planner videos on them. I discovered a new world of decorated planners! I started watching all the planner videos I could find, some were great some I switched off within seconds. Through these videos I found out about several brands of planners that are really popular. One of those is the Life Planner by Erin Condren. The first time I looked at the website and saw the price I was shocked, that thing runs $50! Then I looked at the amount I had already spent on my project of trying to make the perfect planner. I admit it I have spent way more already this year which made me take another look. After watching even more videos I came to the conclusion that this is the planner I have been searching for. So last Sunday I bit the bullet and ordered one. You can pick a customized cover but I decided to go with the “ready to ship” version since I can order a customized cover later if I decide I want one. This way my planner was shipped in just a couple of days instead of having to wait for a week or more for the customized cover to be printed. From the videos I have seen the covers are super easy to change anyway and I might even be able to make my own. (that would be wayyyy cool)

So I ordered on Sunday afternoon and my planner came on Thursday afternoon via FedEx.


*disclaimer time- I very carefully opened the box on Thursday evening but put everything back very carefully so I could take pictures and film video for you guys.

Now I have to admit that I filmed the un-boxing and wrote the above part of the blog post about 3 or 4 weeks ago. I kept telling myself that I needed to get the video and blog post finished but I never got the time to get back to it. (I guess I should have put it in my planner as a “to-do”)

Anyway, since I have been planning in my planner I decided to add a walk through of what I have done in it so far. I am planning to start doing “Plan with me” videos and blogs this week so stay tuned for those (or better yet- subscribe to my channel so you will know when I post them)

Here are pictures of the planner spreads I showed in the video so you can see them closer.

October month at a glance.

I was initially going to add to the decorations on the monthly page each week but changed my mind really quickly on that one. I ended up using some of the stickers that were left in my sticker book from the week of August 10-16. I do love those critters and they look like they are having a great time. They make me smile every time I look at them. I used the side bar to set a monthly goal- almost reached it too. At the bottom of that column is some notes that I need to remember about the month. I designed my own stickers to post on the monthly page when I post a blog and/or video. I made one set and can use them with all my channels easily by simply circling which channel/blog at the bottom. There is just enough room to make a quick note about what the post was. And a place to circle if it was a blog or a video. Most of my posts are both by the way.


Onto the week of August 3-9, this was my first time doing this type of planning although I had already logged a bunch of time watching PWM videos. I stuck with the colors of the month and used printable purchased stickers. I went for a lemons/lemonade theme for the most part.


Okay, now for the first really decorated week, August 10-16. I really took advantage of one of those dollar sticker books that are sold at the craft store. I used a combination of purchased printable stickers and some free ones from Vintage Glam.


The third week I planned, August 17-23, I have to say is my favorite so far. I love the sunflower theme. I was able to find a sheet of sunflower stickers at the craft store. I added to that with some stickers I made myself. I even made my own weekend banner and I really love how it turned out. The rest of the stickers are from some sets of printable stickers I got from Etsy.


The week of August 24-30 ended up being a bug theme. I wanted to stick to the color scheme of yellow and green, I looked for stickers to go with several themes but had very little luck at the local stores. I did find enough bugs in various books of stickers and sheets of stickers that I had on hand to make it work. It isn't my favorite but I do like it.


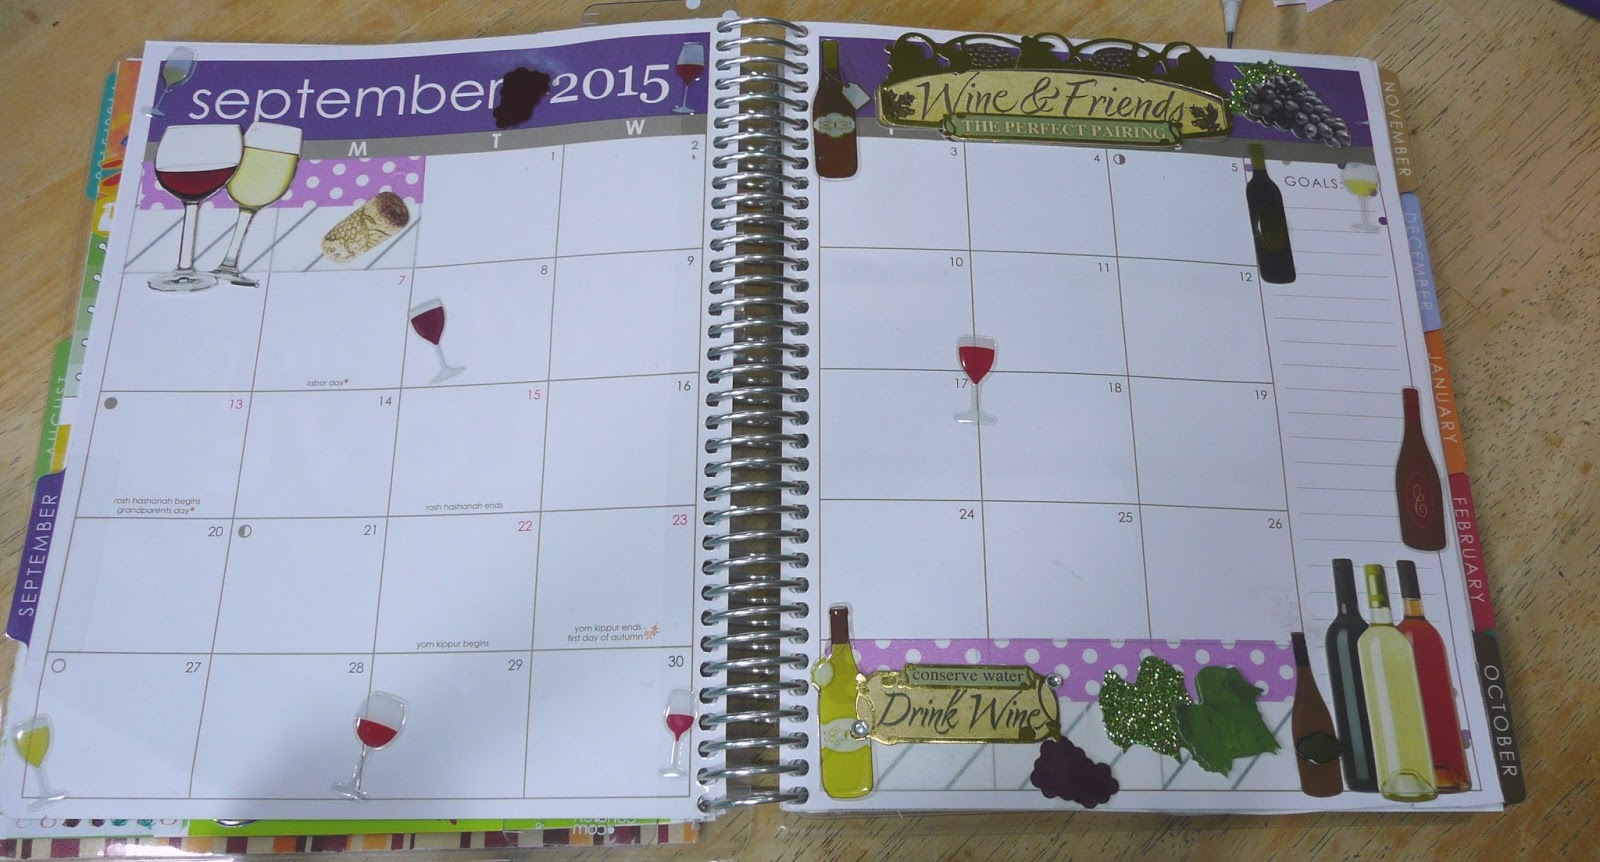
The other page I have decorated is the monthly spread for September. I love the dark purple and gray that the month is colored. The first thing I thought of when I saw the colors for the month was wine/vineyard/grapes. But, I had a really hard time finding stickers to go with what I had in mind. I did find a few so I decided to use them on the monthly page. Most of them dimensional and I don't want to use those on too many pages (I am afraid of making the planner too fat for the binding)

The other big change was the cover, I decided to make my own for the month of September. I picked out a fall leaves paper for it and overall I like how it turned out. I have plans for how to make a better one next time. (Watch for that to be appearing on my planner in October)


So that is my planner so far. 

Saturday, August 22, 2015

August 2015 Ipsy Bag


Join me today at my place to see what I got in my very first Ipsy Bag.

Since I need to put some videos up on the new channel that goes with this blog and I recently received my first Ipsy Bag I thought that would make a good start.


Sorry if the video seems a bit awkward, even though I have certainly done plenty of videos on my other channels this was difficult for me for some reason. I am sure I will get the hang of these new types of videos soon though.

And yeah, I did have to look before I filmed the video to see what I had in the bag. After all this is all new to me and I just couldn't wait to see what was in there.

I really like the bag itself, I think it is really cute! I love, love, love the hot pink with the black and white. Such a pretty combo! And the bag feels really durable, that was something I was concerned about.


So onto the contents of this bag!

Trust Fund Beauty nail polish (color Elegantly Wasted) according to their website this polish sells for $15. I do love the color and can't wait to try it out. I know that I will be doing just that tomorrow when I do my nails. In the photo you can see my swatch stick this is what I do with all my nail polishes before I allow myself to use them I make a swatch stick (I still need to label this one) using 2 coats of the polish. I have one of these sticks done for every one of my polishes. I have them sorted by color on book rings. This makes deciding what color I want much faster and I can consult my swatches before I go shopping for polish so I don't end up with a million bottles that are all the same color.


Doucce Ultra Precision Eyeliner in color 500 the website does call this color Black but on my skin is not a really dark rich black. On my skin it appears to look more like a dark charcoal gray. I will have to actually put it on my eyes to see how it looks there though. The retail price for this eyeliner is $22.


Hikari lip gloss in Merlot, I absolutely love the color of this lip gloss and I can't wait to go somewhere to try it out. The website for this product lists the price at $13. I think this is hands down my very favorite item in the bag.


The Eco-Beauty face cream- this is a nice sized sample pouch of the product. I will be trying it soon. I do like the fact that the sample has a screw off lid so you can use it more than once and not have the rest of the pouch leaking out all over your bathroom. The full size of this product retails for $40 and can be found here.


The Divine Skin Hydrator (in shower body moisturizer) looks very interesting to me since my skin is always soooo dry. I am going to be using this with my very next shower. The sample is 1 oz and the full size (9 oz) retails for $16 dollars according to the website for the product.


So overall I am really pleased with my very first Ipsy bag. I think the value of the contents is definitely worth the cost of the bag. I can't wait for next month to see what comes then.


If I had to pick which items I really don't care about I would say that would be the two samples of moisturizers. Especially the face cream since I am really happy with my current facial skin care routine. The in shower moisturizer sounds cool and I am eager to try it but I really don't care that much.

Do the items you saw here sound interesting to you? If you would like your own Ipsy bag, they only cost $10 and come once a month. You can use the following code to sign up:


Friday, July 31, 2015

A New Name

So I just went in and renamed this blog. I did that for several reasons. When I first started this blog I thought I wanted to just put my extra craft projects here. That has since changed.

We are in the middle of a heat wave this summer here in Oregon and although I haven't been getting a lot of stuff done I have spent a lot of time thinking. I got to thinking about blog posts I want to get done and I really wasn't sure where they fit in. Then it hit me, I already use the name “Joanne's Place” on Etsy and the reason I had went that name was that I felt I could put a variety of things in the shop. (when I actually get around to selling as opposed to buying on Etsy) Well, that was what I decided I wanted this blog to do too, be a place for all the other things I want to post. I already have the mini blog, the 18” doll blog and a cooking blog so you might be wondering what else is there? Well, I do love a lot of things from crafts to sewing to makeup to shopping to …. well you get the idea.

My plan for this blog is to put some crafty type tutorials here, I just got one of those fancy daily planners that are so popular and I want to do some things with that here, I am thinking of trying a few makeup type posts, and maybe some haul type things too. I set up a YouTube account to go with this blog too so there will be both videos and blog posts for most things.


Anyway I hope that clears up any confusion and I hope you hang out with me and see what I'm up to.